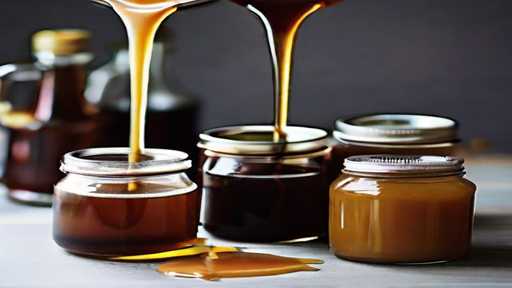
How to make homemade salted caramel syrup
Enjoy the delicious charm of homemade salted caramel syrup. Based on the sweet alchemy of sugar, butter, and a touch of sea salt, this decadent concoction promises to take your cooking to a new level.
Homemade Salted Caramel Syrup Recipe:
Cuisine
International
Total Prep Time
1 Hour
Difficulty
Easy
Ingredients: Homemade Salted Caramel Syrup Recipe
- 1. Granules 1 cup sugar
- 2. 1/4 cup water
- 3. 1/2 cup unsalted butter
- 4. 1/2 cup heavy cream
- 5. 1 teaspoon vanilla extract
- 6. 1/2 to 1 teaspoon sea salt (adjust to taste)
- Substitutes (if desired):
- • Granulated sugar: Brown sugar can be used as an alternative with a slightly different flavor profile.
- • Unsalted butter: If using salted butter, reduce or omit the addition of sea salt accordingly.
- • Cream: Half or whole milk can be used as a substitute, but the consistency and taste may vary slightly.
Cooking Instructions: Homemade Salted Caramel Syrup
- Step 1: Prepare ingredients.
- 1. Weigh the sugar, water, butter, cream, and sea salt.
- 2. Caramel mixes quickly, so make sure you have all the ingredients prepped and on hand.
- Step 2: Dissolve the sugar.
- 1. Heat the granulated sugar in a heavy-based pot over medium heat.
- 2. Gently swirl the pot from time to time to ensure even melting. Do not stir at this stage.
- 3. When the sugar dissolves, it turns a deep amber color. Be careful of your eyes to avoid burns.
- Step 3: Add the butter
- 1. Once the sugar has completely melted and turned a rich amber color, add the unsalted butter. Be careful when mixing as bubbles will form.
- 2. Add the butter to the caramel and stir until completely melted and well mixed.
- Step 4: Mix the cream
- 1. Slowly pour in the cream, stirring constantly. Again, be careful if bubbles form.
- 2. Cook the mixture for about 1 minute so that the cream is completely incorporated.
- Step 5: Add Sea Salt
- 1. Stir in sea salt and adjust the amount to taste.
- 2. Cook for another 1-2 minutes until the salt is completely dissolved.
- Step 6: Check Consistency
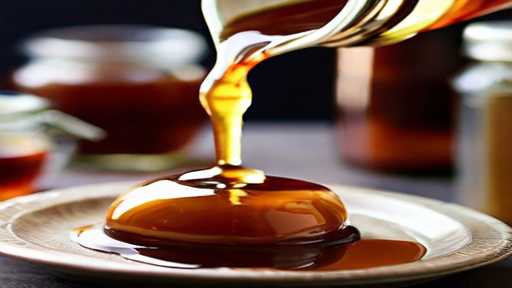
- 1. To check consistency, place a small amount of caramel on a cold plate. It should thicken as it cools.
- 2. If the consistency is too thin, simmer for another minute.
- Step 7: Cool and store
- 1. Remove the caramel from the heat and let it cool for a few minutes.
- 2. Pour the salted caramel syrup into a heatproof container and let it cool completely before sealing.
- 3. Keep refrigerated for up to two weeks.
- Tips:
- • Be careful when handling hot sugar to avoid burning yourself.
- •To guarantee uniform melting and avoid scorching, stir continuously.
- • Adjust the sea salt to your taste to achieve the perfect balance of sweet and salty.
- • Syrup thickens as it cools. So don’t worry if it looks thin at first.
- • Warm well in the microwave or stove before use.
Cookware and equipment: homemade salted caramel syrup.
- 1. Heavy pot: Used to heat and caramelize sugar.
- 2. Wooden spoon or heat-resistant silicone spatula: Used to stir ingredients during caramelization.
- 3. Measuring cup/measuring spoon: Accurately measure ingredients such as sugar, water, and salt.
- 4. Whisk: Mix ingredients evenly to avoid lumps.
- 5. Heat-resistant brush: For brushing the sides of the pot to prevent sugar crystallization.
- 6. Candy Thermometer: Used to monitor the temperature of the caramel and achieve the desired consistency.
- 7. Fine mesh strainer: Used to strain caramel syrup to remove impurities and lumps.
- 8. Glass or heat-resistant container: for storing finished salted caramel syrup.
- 9. Oven gloves: protect your hands when handling hot pots and utensils.
- 10. A small bowl of cold water: test the caramelization stage by dropping a small amount of caramel into it.
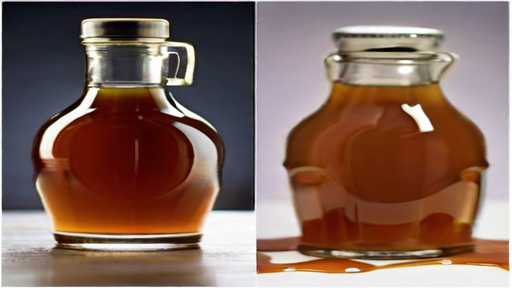
- 11. Sealed Bottle or Jar: Store your homemade salted caramel syrup once it is finished.
- 12. Labels and Markings: Label and date containers for easy identification.
Pairing: Homemade Salted Caramel Syrup
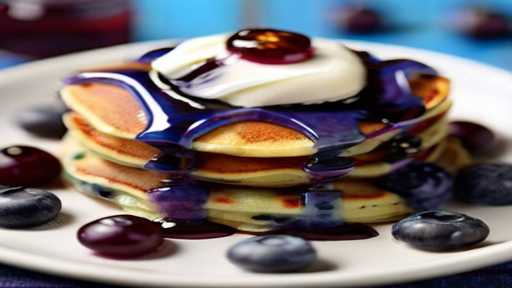
- 1. Pancakes and homemade salted caramel syrup
- 2. Vanilla ice cream and salted caramel syrup
- 3. Waffles with salted caramel syrup
- 4. Apple pie with salted caramel icing
- 5. French Toast with Salted Caramel Topping
- 6. Salted Caramel Swirl Brownie Sundae
- 7. Salted Caramel Latte with Homemade Syrup
- 8. Salted Caramel Cheesecake with Syrup
- 9. Crepes with Salted Caramel Sauce
- 10. Bananas Foster Pancakes with Caramel Drizzle
- 11. Salted Caramel Hot Chocolate
- 12. Salted Caramel Popcorn Syrup
- 13. Salted Caramel Milkshake with Homemade Syrup
- 14. Salted Caramel Apple Nachos
- 15. Salted Caramel Pecan Cake with Syrup
- 16. Grilled Peach with Salted Caramel Sauce
- 17. Salted Caramel Chocolate Fondue
- 18. Salted Caramel Mocha Cupcake
- 19. Greek Yogurt Parfait with Salted Caramel Layer
- 20. Pumpkin Spice Latte with a Hint of Salted Caramel
Tips for Cooking Homemade Salted Caramel Syrup:
- 1. Patience is Key: Making salted caramel syrup requires patience. Be careful and do not rush the caramelization process. “Low and slow” is the motto here, resulting in a richer flavor and beautiful amber color.
- 2. High-quality ingredients: Use high-quality ingredients to get the best taste. Choose real butter, pure vanilla extract, and high-quality sea salt. The quality of these ingredients has a huge impact on the final taste of your salted caramel syrup.
- 3. Even heat distribution: Use thick-bottomed pots to ensure even heat distribution. This prevents hot spots and promotes even caramelization.
- 4. Avoid over-stirring: It’s tempting to stir constantly, but don’t overdo it. Wait until the sugar naturally dissolves and caramelizes, stirring occasionally. Too much stirring can cause the sugar to crystallize.
- 5. Monitor the temperature: Use a candy thermometer to monitor the temperature. To caramelize properly, the sugar needs to reach the right temperature, around 177°C (350°F). This ensures that the syrup has the proper consistency and taste.
- 6. Safety first: Be careful when handling hot sugar. Use pot holders and avoid touching the caramel directly. If your children are nearby, please keep a safe distance.
- 7. Add cream little by little. When adding the cream to the caramelized sugar, add it a little at a time to prevent the mixture from clumping. Pour slowly and evenly to mix the ingredients smoothly.
- 8. Adjust the taste: Adjust the salty and sweetness to your taste. Start with a little salt, taste and add more salt if needed. If you prefer a sweeter syrup, adjust the amount of sugar slightly.
- 9. Versatility: This homemade salted caramel syrup is incredibly versatile. Use as a topping for ice cream, pancakes, waffles, or drizzle over desserts. It’s also a delicious addition to coffee or hot chocolate.
- 10. Storage Tip: Store salted caramel syrup in an airtight container in the refrigerator. Easily reheat before use. If the syrup thickens in the refrigerator, thin it with a little warm cream or water.
Suggestions for serving homemade salted caramel syrup:
- Presentation:
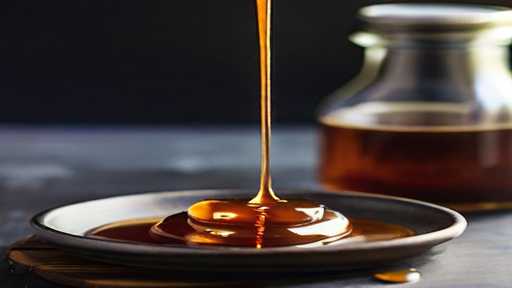
- 1. Drizzling elegance: When serving homemade salted caramel syrup, consider serving it in stylish, clear glasses. The syrup’s rich golden-brown hue is visually appealing and emphasizes its decadence.
- 2. Perfect Pour: Pour caramel syrup into a slim, narrow-mouth pitcher to create a precise and controlled drizzle. Not only does it add a touch of sophistication, but it’s also easy to pour into a variety of desserts.
- 3. Dip and enjoy: Set out a small bowl or baking dish next to the syrup for dipping. This allows individuals to customize their portions and facilitates interactive dining.
- Side Dishes:
- 1. Fleur de Sel Streusel: Enhance the salted caramel flavor by carefully sprinkling a pinch of fleur de sel (sea salt flakes) over the syrup just before serving. The contrasting textures bring out the flavor even more.
- 2. Whipped Cream Swirl: For a delicious kick, add a generous dollop of fresh whipped cream to your salted caramel creations. The combination of sweet syrup and creamy topping creates a delicious balance of flavors.
- 3. Toasted Nut Crunch: Consider adding a handful of chopped toasted nuts, such as almonds or pecans, as a garnish. The crunch of the nuts complements the smoothness of the caramel, creating a delicious texture.
- Accompaniments:
- 1. Vanilla Ice Cream Treat: Serve homemade salted caramel syrup over a scoop (or two) of premium vanilla ice cream. Hot and cold create a great contrast and make an ideal dessert.
- 2. Pancake or Waffle Drizzle: Elevate your breakfast or brunch by drizzling caramel syrup over a stack of fluffy pancakes or crispy waffles. The combination of sweet and salty will turn an ordinary morning into a special time.
- 3. How to enjoy apple slices: Cut fresh apples into thin wedges and arrange them on a plate. Pour caramel syrup into a small bowl and dip for an irresistible combination reminiscent of caramel apples.
- 4. Coffee Elixir: Add a spoonful of salted caramel syrup to your morning coffee for a decadent vibe. The rich caramel flavor brings a delicious sweetness that turns your everyday beer into a luxurious moment.
Homemade salted caramel syrup storage and leftovers:
- 1. Storage location:
- • Allow the salted caramel syrup to cool to room temperature before transferring to a suitable container.
- • Choose an airtight glass or plastic container to prevent outside odors from affecting the flavor of the syrup.
- • To extend the shelf life of the syrup, store the container in the refrigerator. The low temperature maintains freshness.
- 2. Refrigerate:
- • For best flavor and quality, use syrup within 2-3 weeks.
- • Caramel can crystallize over time, so stir the syrup briefly before using to maintain a smooth consistency.
- 3. Freezing (optional):
- • If you have prepared a large amount of syrup or if you want to store it for a long time, you should freeze it.
- • Use a freezer-safe container and leave space at the top for expansion.
- • Thaw frozen syrup in the refrigerator overnight before reheating or using.
- 4. To reheat:
- • If using salted caramel syrup, remove from refrigerator or freezer.
- • Cooled syrup can be gently heated in the microwave or on the stove. Microwave briefly, stirring halfway through, or heat on low heat on the stove to avoid overheating.
- • If the syrup is frozen, thaw it in the refrigerator first, then follow the reheating instructions above.
- 5. Quality Assurance:
- • Caramel burns easily, so be careful not to overheat the syrup. Reheating slowly and gently is the key to maintaining silky texture and deliciousness.
- • Always use clean, dry utensils to scoop the required amount of syrup to avoid contamination.
Homemade Salted Caramel Syrup Nutritional information (per serving):
- • Calories: Approximately 50 kcal
- • Fat: 2 g
- • Saturated fat: 1.5 g
- • Trans fat: 0 g
- • Protein: 0 g
- • Carbohydrates: 10g
- • Sugar: 10g
- • Dietary Fiber: 0g
- • Sodium: 100mg (Note: Salt contributes to sodium content)
- Note: Nutritional values are approximate and may vary depending on the specific homemade ingredients and quantities It may vary. The salted caramel syrup used will vary.
Potential health benefits associated with homemade salted caramel syrup include:
- 1. Controlling Sugar Content:
- • Making your own salted caramel syrup allows you to control the amount of sugar you use. You can choose natural sweeteners or reduce the overall sugar content. This is beneficial for people who want to control their sugar intake.
- 2. Quality Ingredients:
- • Making syrup at home gives you the opportunity to choose quality ingredients. This includes the use of organic sugar, pure vanilla extract, and high-quality sea salt, which can contribute to a healthier product.
- 3. No Artificial Additives:
- • Homemade Salted Caramel Syrup is free of artificial additives and preservatives commonly found in commercial products. This is beneficial for people who are sensitive to certain additives or want to avoid them.
- 4. Adaptation to Dietary Requirements:
- • When making your own syrup, you can adapt the recipe to your specific dietary requirements. For a low-calorie or diabetic-friendly option, you can use alternative sweeteners such as maple syrup, agave syrup, or stevia.
- 5. Rich flavor without overdoing it:
- • The rich flavor of homemade salted caramel syrup means you only need a little to enhance the flavor of desserts and drinks. This will prevent you from binge eating and consuming too many calories.
- 6. Enjoy in moderation:
- • Incorporating a small amount of homemade salted caramel syrup into your diet is a delicious way to satisfy your sweet cravings without resorting to highly processed and less nutritious alternatives. Moderation is the key to a balanced and enjoyable diet.
- 7. Mindful Consumption:
- • Making your own salted caramel syrup promotes mindful consumption. Knowing the labor and ingredients that go into making sweets will help you develop a greater awareness and appreciation for sweet treats.
Variations: Homemade Salted Caramel Syrup

- 1. Salted Caramel Syrup with Vanilla: Add a little vanilla extract or scrape vanilla bean seeds into the caramel mixture for a delicious accent.
- 2. Salted Caramel Syrup with Chocolate: Add cocoa powder or melted chocolate to caramel to create a rich and delicious chocolate-flavored syrup.
- 3. Maple Salted Caramel Syrup: Replacing some of the sugar with maple syrup gives caramel syrup a warm, distinct maple flavor.
- 4. Espresso Salted Caramel Syrup: Add a shot of strong espresso to create coffee-infused caramel syrup, perfect for enhancing the flavor of your favorite beverage.
- 5. Salted Caramel Coconut Syrup: Add coconut milk or shredded coconut to caramel for a tropical, slightly nutty flavor.
- 6. Pumpkin Spice Salted Caramel Syrup: Blend pumpkin pie spice or cinnamon to create a seasonal, flavorful pumpkin spice caramel syrup.
- 7. Salted Caramel Syrup with Orange Peel: Add finely grated orange peel to give caramel a lemony brightness and a refreshing twist.
- 8. Chai Spiced Salted Caramel Syrup: Combine chai spices like cardamom, cinnamon, ginger, and cloves to create a warm, spicy caramel experience.
- 9. Hazelnut Salted Caramel Syrup: Mix in hazelnut extract or finely chopped toasted hazelnuts to give the caramel a delicious nutty flavor.
- 10. Salted Caramel Syrup with Lavender: Add edible dried lavender to caramel to add a unique, floral touch and create an elegant syrup.
- 11. Gingerbread Salt Caramel Syrup: Blend ginger, cinnamon, and nutmeg to recreate the flavor of gingerbread for a festive and comforting syrup.
- 12. Cardamom Rose Salted Caramel Syrup: The exotic flavors of cardamom and rosewater combine to create a fragrant and sophisticated caramel syrup.
- 13. Bourbon Salted Caramel Syrup: Adding bourbon to caramel creates a juicy, decadent syrup perfect for desserts and adult beverages.
- 14. Salted Caramel Syrup with Almond Butter: Add almond butter and stir to create a delicious, nutty salted caramel syrup.
- 15. Salted Caramel Syrup with Citrus Mint: Infuse the syrup with a mixture of citrus peel (orange, lemon, or lime) and fresh mint to give it a refreshing, tangy flavor.
- 16. Salted Caramel Syrup with Raspberry Swirl: Add fruity, tart notes to your caramel syrup by adding raspberry puree or swirling raspberry jam.
- 17. Smoky Chipotle Salted Caramel Syrup: Add chipotle powder or finely chopped smoked paprika to add a smoky flavor to the caramel mixture.
- 18. Apple Cinnamon Salt Caramel Syrup: Mix apple cider reduction and ground cinnamon to create a delicious fall-inspired caramel syrup.
- 19. Matcha Salted Caramel Syrup: Creates a bright green tea-infused caramel syrup that incorporates matcha powder for a unique, earthy flavor.
- 20. Mango Passionfruit Salted Caramel Syrup: Add tropical flavor to your salted caramel syrup by adding mango puree and passionfruit juice.
Recipe Notes: Homemade Salted Caramel Syrup

- 1. The magic of caramelization: Achieving the perfect caramel color and flavor requires patience. Allow the sugar to slowly dissolve and develop a deep amber color without stirring too often. This process thickens the syrup.
- 2. Butter luck: Don’t skimp on butter. It not only provides a luxurious creaminess, but also contributes to the glossy texture of the syrup. To control the overall sodium content, choose unsalted butter.
- 3. Salt selection: Try different salts to find your preferred salt level. The sea salt gives it a subtle saltiness, while the salt flakes on top add a delicious crunch and a burst of flavor.
- 4. Tips for whipping: When mixing cream, stir constantly to avoid lumps. Add the cream little by little while stirring to create a smooth, velvety consistency.
- 5. Store wisely: Store homemade salted caramel syrup in a glass jar in the refrigerator. It lasts about 2 weeks. To return to a pourable consistency, heat gently in the microwave or on the stove.
- 6. Versatile Elixir: Top ice cream, drizzle on desserts, or add a spoonful to your coffee or hot chocolate for a luxurious taste. Also perfect as a gift. Spread the sweetness to your loved ones.
- 7. Cultural Delight: Caramel has a rich history in various cultures. Discover the roots of French cuisine in dessert classics like crème caramel, or delve into Latin America’s dulce de leche to show the diverse appreciation for caramel from around the world.
- 8. A personal touch: Share the joy of making this syrup with your loved ones. Enjoy it as a family activity and reminisce about fond memories of enjoying caramel sweets together. Customize recipes by adding nuts, spices, or your favorite liqueur for a unique twist.
- 9. The Art of Drizzle: Master the art of drizzle using precision squeeze bottles and spoons. The beautifully scattered caramel pattern will take your dessert presentation to the next level.
- 10. Experimentation is encouraged: Feel free to experiment with different sugars (for example, brown sugar for a stronger flavor) and ratios to adjust the syrup to your taste. The fun of homemade caramel is that you can make it unique.
FAQ: Homemade Salted Caramel Syrup
- Q1: Can I use salted butter in place of unsalted butter in the recipe?
- A2: Yes, you can use salted butter, but the additional salt in the recipe must be adjusted accordingly There may be cases. Salted butter already adds a salty taste to the caramel, so start with a little salt and taste the syrup before adding more.
- Q2: How can I prevent crystallization when making salted caramel syrup?
- A1: To prevent crystal formation, make sure your cookware and cooking pot are completely Please make sure it is clean. Before you begin, use a wet pastry brush to remove any sugar crystals from the sides of the pot. Also, avoid stirring once the sugar starts to melt, and cover the pot to let the steam wash away the sugar crystals from the sides.
- Q3: Can I store Homemade Salted Caramel Syrup? How long does it last?
- A2: Yes, Homemade Salted Caramel Syrup can be stored in an airtight container in the refrigerator for up to two weeks. If you want to reheat it, gently heat it in the microwave or on the stove. If it solidifies in the fridge, thin it with a little warm cream until you reach your desired consistency.
In summary, making homemade salted caramel syrup is delicious and easy. The combination of sugar, butter, cream, and salt creates a rich, golden syrup that adds a delicious accent to a variety of desserts and drinks.